
10 DIY Headboards You Can Make in July for Move-In Day: The Ultimate Dorm Glow-Up

College dorm beds are basically just sad, uncomfortable rectangles of institutional furniture. You’ve spent hours scrolling Pinterest, saving those perfectly aesthetic, cozy dorm rooms, but then you look at the reality of that standard-issue Twin XL and panic a little.
As an affiliate partner of various brands and sponsored content, SimpleStudentPlans may earn commission on qualifying purchases. Disclaimer | Advertise With Us
Don’t stress. You don’t need to drop hundreds of dollars on a custom headboard that you’ll only use for nine months, and you definitely shouldn’t wait until August to figure out your room’s vibe. July is the absolute perfect time to knock out some easy DIY projects for move-in day.
By tackling a DIY dorm headboard right now, while you’re still at home and have access to actual space (and maybe your parents’ garage), you’ll save yourself massive amounts of move-in week stress. Plus, creating a custom headboard is the easiest way to establish your room’s color palette and aesthetic instantly.
Whether you’re dealing with a strict “no nails” policy, a tiny budget, or zero crafting skills, I’ve got you covered. Here are 10 completely foolproof, realistic, and aesthetic DIY headboards you can prep in July so you’re ready to roll for move-in day. Let’s get into the ultimate budget-friendly dorm decor guide!
1. The Classic Cardboard & Fabric Faux-Tufted DIY Dorm Headboard
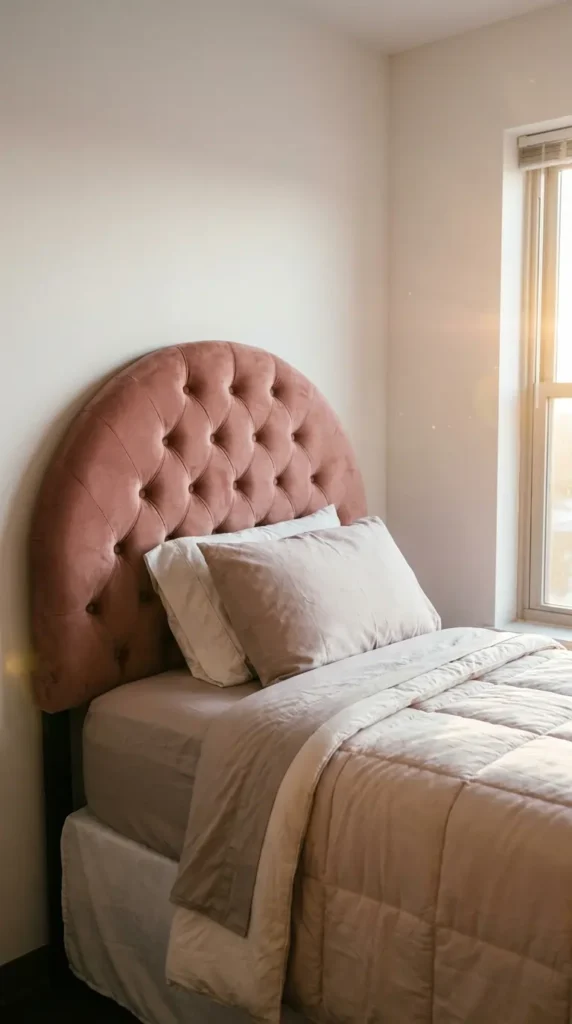
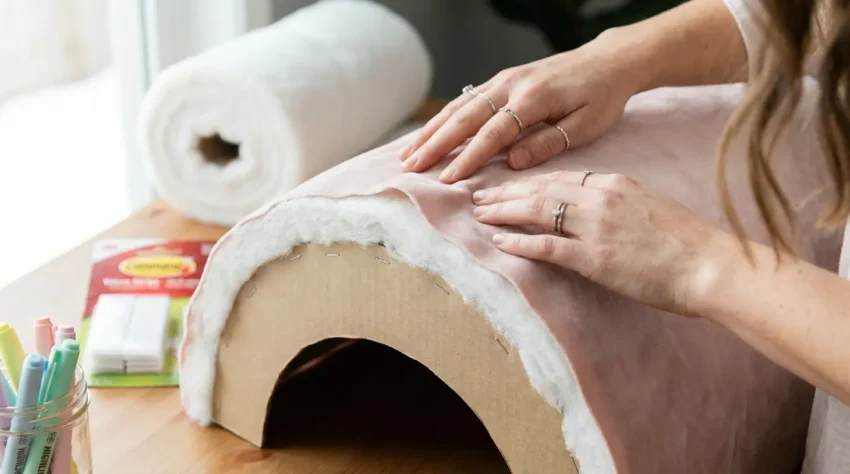
If there is one reigning champion of budget-friendly dorm decor, it’s the faux-tufted cardboard headboard. It looks incredibly high-end, mimics the look of expensive velvet or linen headboards, and literally weighs almost nothing, making it a dream for command-strip mounting.
What You Need:
- A large, sturdy piece of cardboard (cut to 39 inches wide for a Twin XL)
- Quilt batting or foam padding
- 1.5 yards of your favorite aesthetic fabric (velvet or linen works best)
- A heavy-duty staple gun or extreme double-sided fabric tape
- Heavy-duty Command Strips for hanging
How To Make It:
- Cut the Base: Trim your cardboard down to your desired shape. You can do a standard rectangle or cut a trendy arch into the top.
- Add the Fluff: Wrap the cardboard in two to three layers of quilt batting to make it look plush and soft. Secure it tightly at the back with your staple gun or tape.
- Wrap the Fabric: Lay your decorative fabric face down on the floor, place the padded cardboard on top, and pull the fabric tight across the back, stapling as you go. Imagine you’re wrapping a really tight present.
- Install: Once move-in day hits, slap four heavy-duty Command Strips on the back and press it right against your dorm wall above your mattress.
Why It’s Perfect for College: It is 100% damage-free, insanely cheap to make, and you can customize the fabric to match your exact bedding aesthetic.
2. The Trendy Pool Noodle Fluted Arch
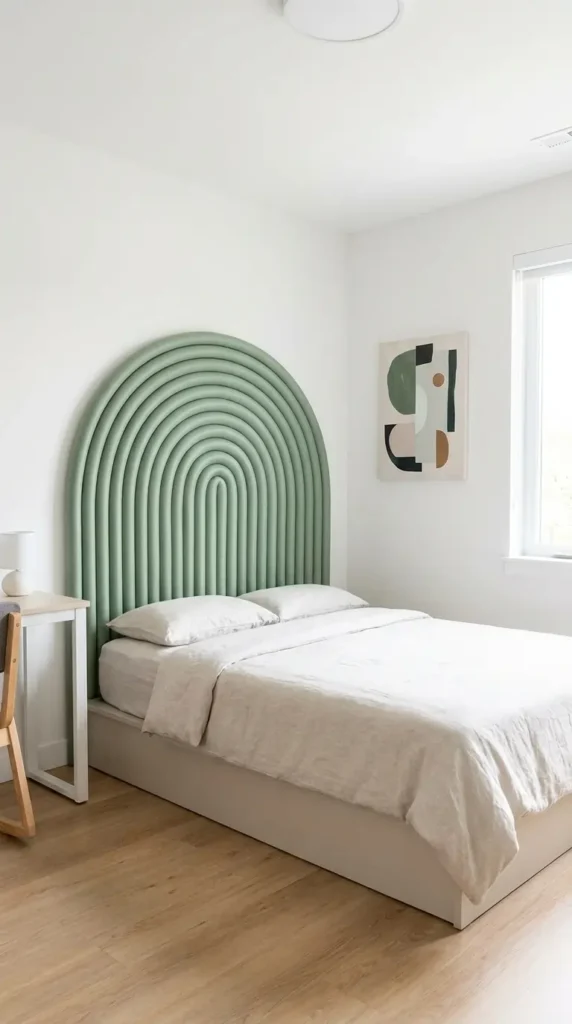
Fluted furniture is absolutely everywhere on Pinterest and TikTok right now. It gives that modern, expensive, architectural vibe. Believe it or not, you can fake this highly sought-after custom dorm room idea using dollar-store pool noodles.
What You Need:
- A piece of foam board or cardboard cut into an arch shape
- 5-7 pool noodles (grab these now while it’s July!)
- A serrated knife or box cutter
- Hot glue gun and extra glue sticks
- Spray paint or fabric to cover the noodles
- Velcro Command Strips
How To Make It:
- Prep the Base: Cut your foam board into an arch that is slightly wider than your mattress.
- Halve the Noodles: Carefully slice all of your pool noodles in half lengthwise so they have a flat back.
- Glue It Down: Hot glue the flat side of the pool noodles vertically onto your arch base, pressing them tightly against each other to create that ribbed, fluted texture.
- Color It: You can either spray paint the entire thing (do this outside in July!) or stretch a thin, stretchy fabric over the grooves.
- Mount: Use Velcro Command Strips to attach it directly to your dorm wall.
Why It’s Perfect for College: It adds incredible 3D texture to your room without taking up any actual floor space.
3. The Lazy-Girl Tapestry Tension Rod Headboard
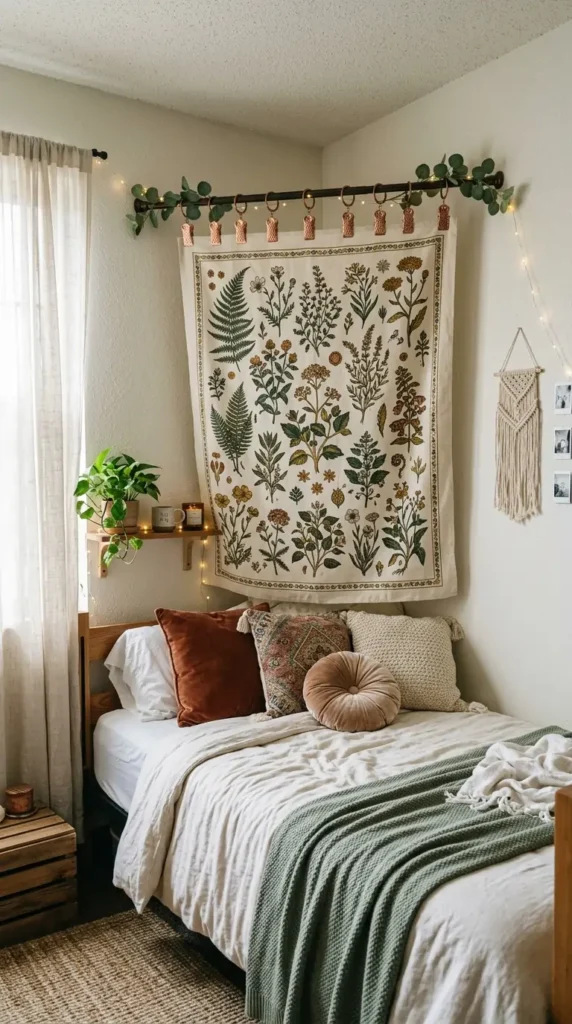
If you want the easiest possible how to make a headboard for a dorm tutorial, this is it. No glue, no cutting, no crafting. This is for the girlies who want maximum impact with zero DIY tears.
What You Need:
- An adjustable tension rod (make sure it expands wider than your bed)
- A lightweight tapestry, rug, or beautiful piece of fabric
- Curtain ring clips
How To Make It:
- Clip It: Attach the curtain ring clips evenly across the top of your tapestry or fabric.
- String It: Slide the rings onto your tension rod.
- Wedge It: During move-in day, wedge the tension rod between two walls (if your bed is in an alcove) or hang the tension rod from the ceiling using two damage-free adhesive ceiling hooks.
- Style It: Let the fabric drape down behind your pillows.
Why It’s Perfect for College: It takes three minutes to set up, requires zero tools, and is completely reusable if you move to an apartment next year.
4. The Hanging Pillow Leather Strap Headboard
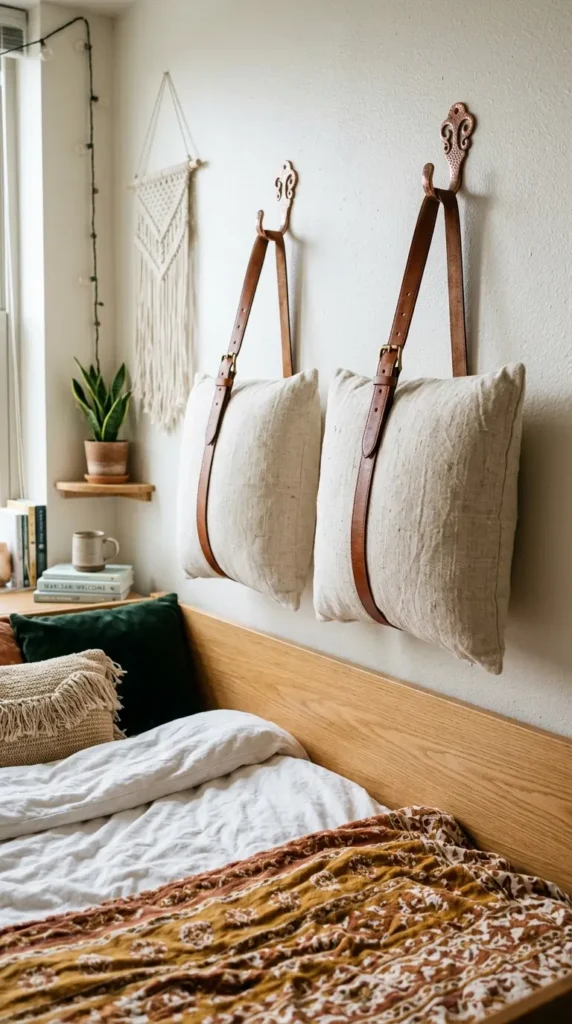
This look screams “cool, curated apartment” rather than “freshman dorm.” It uses two large, comfortable cushions suspended from aesthetic straps to create a cozy backrest for late-night studying.
What You Need:
- Two standard pillows or one long body pillow
- Pillowcases that match your room’s vibe
- Two long leather (or faux leather) belts or straps
- Two decorative, heavy-duty adhesive wall hooks
How To Make It:
- Prep the Straps: Cut your leather straps into identical lengths and form them into loops.
- Hang the Hooks: Stick your adhesive hooks on the wall directly above where your bed will go, spacing them out evenly.
- Loop the Pillows: Slide your pillows into the leather loops.
- Suspend: Hang the leather loops from the adhesive hooks.
Why It’s Perfect for College: It acts as actual, functional back support when you are sitting up in bed typing a paper at 2 AM.
5. The Faux Vine & Fairy Light Curtain
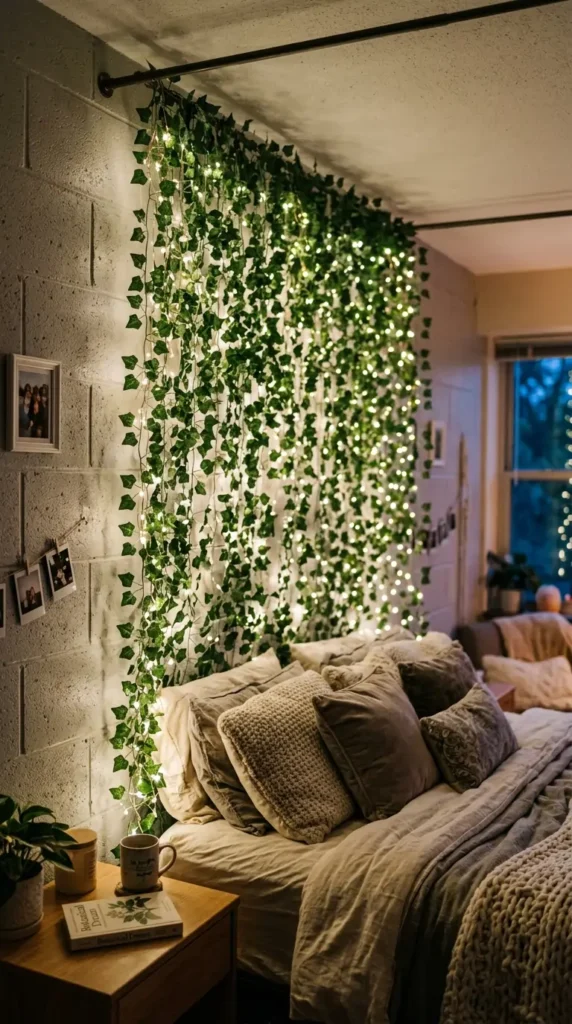
If your aesthetic is fairycore, cottagecore, or you just love a cozy, glowing ambiance, this DIY dorm headboard alternative is an absolute must-prep for July.
What You Need:
- A pack of artificial ivy vines
- Curtain string lights (warm white)
- A lightweight curtain rod or a long stick/branch
- Mini clear Command hooks
How To Make It:
- Prep the Rod: In July, measure out your vines and wrap the top stems around your curtain rod or branch so they hang down evenly.
- Weave the Lights: Intertwine the curtain fairy lights with the hanging vines. Secure them together with tiny zip ties if needed.
- Roll It Up: Carefully roll the whole setup up so it doesn’t tangle in transit.
- Move-In Day: Stick two or three Command hooks on the wall above your bed, place the rod on the hooks, and let the glowing vines cascade down behind your bed.
Why It’s Perfect for College: It replaces the need for a bulky headboard while providing the essential ambient lighting every dorm room desperately needs.
6. The Painted Arch Wall Decal Illusion
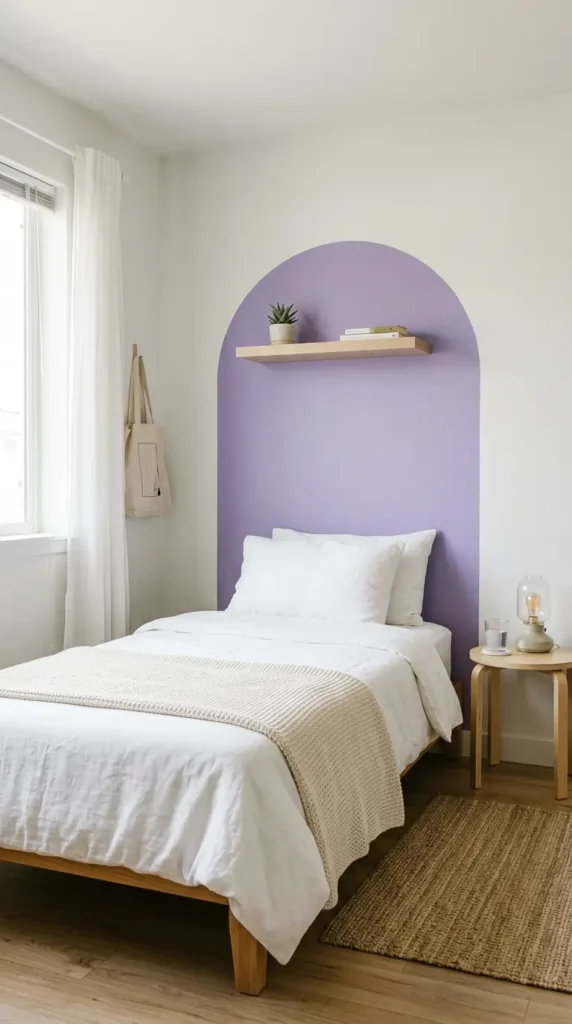
Sometimes, the best headboard isn’t a physical object at all. It’s a visual anchor. Painting a dorm wall is usually a huge lease violation, but using peel-and-stick wallpaper or a massive wall decal creates the exact same look without the fines.
What You Need:
- A roll of peel-and-stick solid color wallpaper OR a pre-cut arch wall decal
- A smoothing tool (a credit card works)
- Scissors
How To Make It:
- Order in July: Buy your peel-and-stick wallpaper or pre-cut decal now so it arrives in time.
- Measure: Once you get to your dorm, figure out exactly where the center of your bed will be.
- Peel and Stick: Carefully apply the decal or wallpaper to the wall, creating a large, solid block of color right where a headboard would sit. Smooth out any bubbles.
- Style: Push your bed against the wall and pile up your pillows against the color block.
Why It’s Perfect for College: It takes up strictly zero inches of physical space, which is critical in a shoebox-sized dorm room.
7. The Pegboard Productivity Station
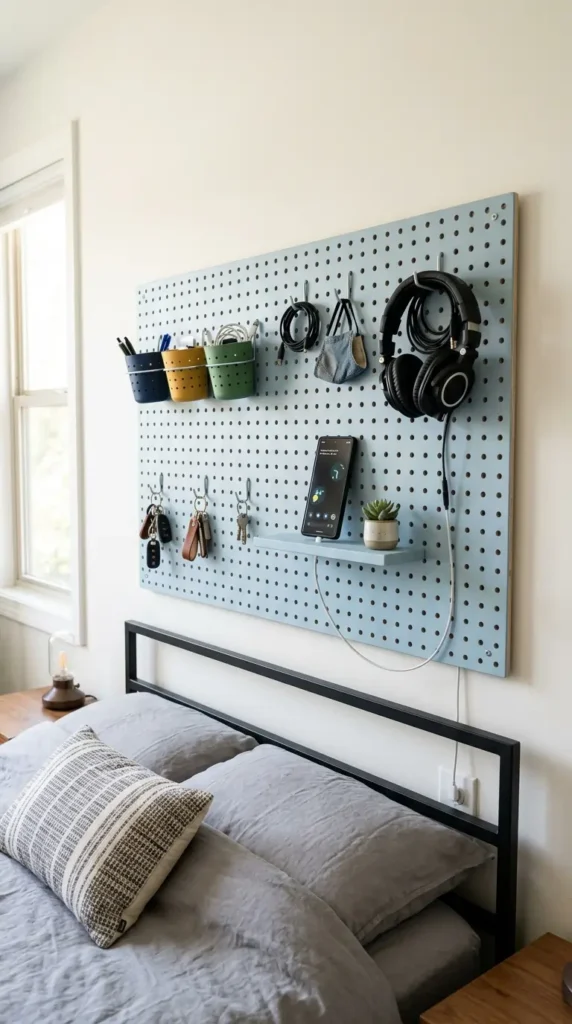
If you are a hardcore Type-A student who loves organization, why not make your headboard work double duty? A pegboard headboard gives you a place to lean back and a place to store your essentials. This is one of the smartest easy DIY projects for move-in day.
What You Need:
- A large IKEA SKÅDIS pegboard or a hardware store wooden pegboard
- Pegboard accessories (cups, hooks, shelves)
- Heavy-duty Command Strips (make sure to check the weight limit)
How To Make It:
- Customize (Optional): Paint your pegboard in July to match your dorm room colors.
- Mount: On move-in day, use multiple heavy-duty Command Strips to attach the pegboard firmly to the wall above your mattress.
- Organize: Add small cups for your highlighters, hooks for your keys and headphones, and a tiny shelf for your phone to charge at night.
Why It’s Perfect for College: It saves precious desk space by moving your storage to the wall behind your bed.
8. The Woven Macrame Masterpiece
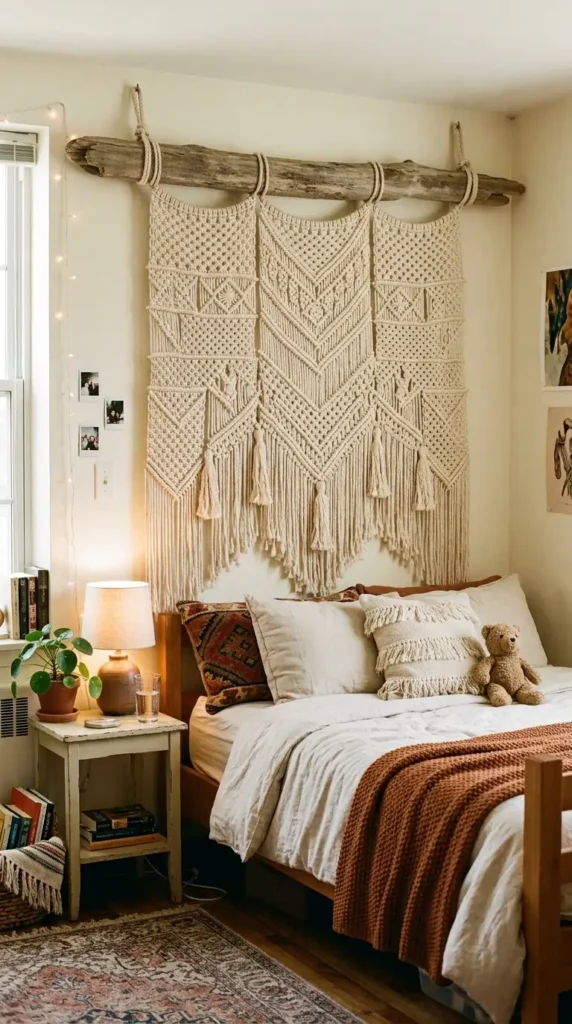
Boho-chic is a dorm style that never dies. If you have some free time in July, you can actually knot your own macrame headboard wall hanging. It sounds intimidating, but it is basically just repeating the same knot over and over while watching Netflix.
What You Need:
- Macrame cord (cotton rope, 3mm or 4mm thickness)
- A wooden dowel or a sturdy piece of driftwood (about 40 inches long)
- Scissors
- Clear wall hooks
How To Make It:
- Learn the Square Knot: Look up a quick 5-minute YouTube tutorial on basic macrame knots.
- Knot Away: Spend your July evenings knotting the cords onto your wooden dowel until you create a beautiful, textured pattern that falls down the wall.
- Hang It: Hang the dowel from two clear wall hooks above your bed.
Why It’s Perfect for College: It brings instant warmth and texture to stark white cinderblock dorm walls.
9. The Faux Wood Slat Headboard
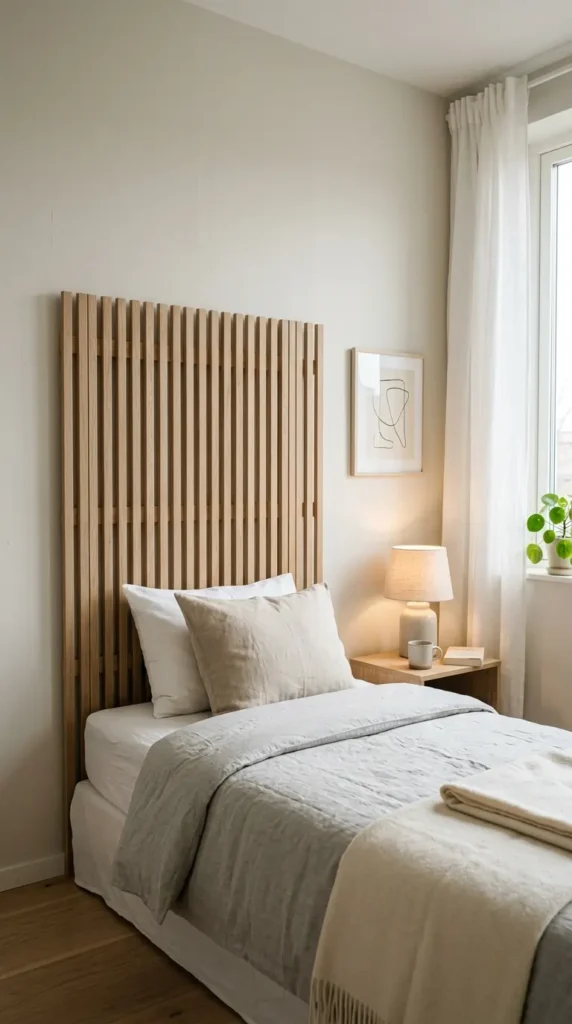
Love the rustic, earthy look of a wooden headboard, but can’t bring heavy power tools or actual lumber into a dorm? You can fake a custom wood slat headboard using lightweight materials.
What You Need:
- Balsa wood strips (available at craft stores; they are incredibly light) or wood-look vinyl contact paper
- A large piece of foam board
- Wood stain (if using real balsa wood)
- Hot glue
- Mounting strips
How To Make It:
- Stain the Wood: If using balsa strips, give them a quick coat of light wood stain in your garage during July.
- Glue to Base: Hot glue the lightweight strips horizontally or vertically onto your foam board base, leaving a tiny gap between each strip for that modern slatted look.
- Mount: Because balsa wood and foam board weigh next to nothing, you can easily hang this with standard damage-free strips.
Why It’s Perfect for College: It adds a mature, organic, architectural element to the room without violating the dorm’s heavy furniture restrictions.
10. The Gallery Wall “Illusion” Headboard
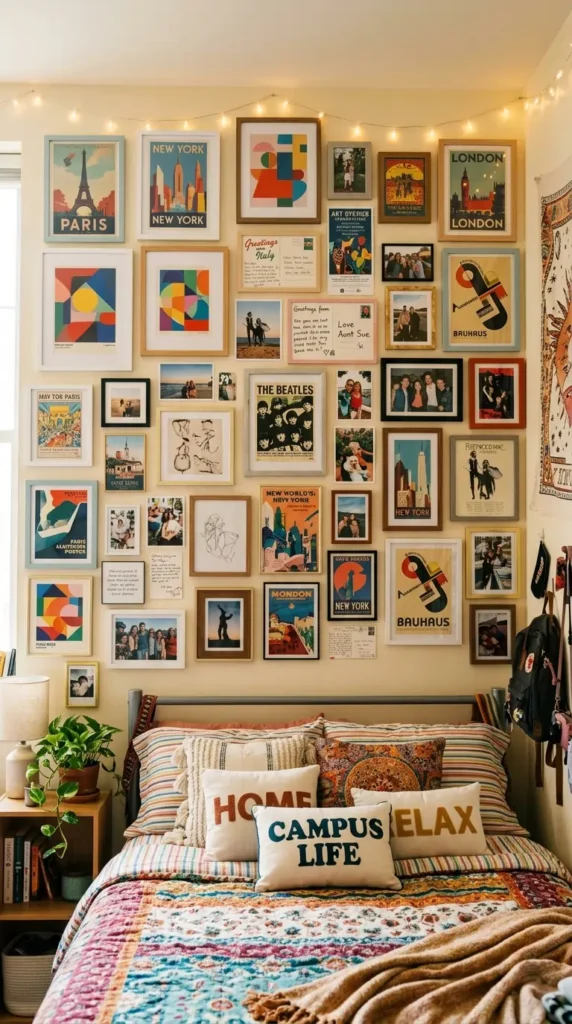
Can’t decide on one single DIY? Don’t make a physical headboard at all. Instead, prep a meticulously curated gallery wall that frames the space where a headboard would be.
What You Need:
- A mix of 5-8 posters, art prints, and postcards
- Lightweight acrylic frames or poster tape
- Painter’s tape (for planning)
How To Make It:
- Curate in July: Spend the summer sourcing digital downloads from Etsy or printing out Pinterest quotes. Frame them in lightweight, cheap frames.
- Map it Out: Cut pieces of newspaper to the exact size of your frames.
- Tape it Up: On move-in day, use painter’s tape to stick the newspaper templates to the wall in a low, tight cluster right above your bed.
- Nail the Look: Once you love the layout, replace the paper templates with the actual frames using command strips.
Why It’s Perfect for College: It is highly personal, deeply aesthetic, and completely modular; if you get bored in October, you can just swap out the art!
Let’s Manage Those Dorm Expectations
Okay, pause. We need to have a quick reality check before you go wild at the craft store. Pinterest makes dorm rooms look like luxury penthouses, but the truth is: your room is tiny, you share it with a stranger, and the walls are literally painted concrete.
Do not spend $200 making a massive, heavy, solid-wood headboard that you’re going to have to haul up three flights of stairs in the August heat. It’s a rookie mistake. It will likely damage the wall, and your RA will fine you at the end of the year.
The goal of a DIY dorm headboard is the illusion of luxury. Keep it incredibly lightweight, rely heavily on command strips, and make sure whatever you build is something you won’t mind tossing or storing under a bed at the end of the semester. Keep it simple, keep it cheap, and focus on the vibes, not structural engineering.
Key Takeaways
- Prep in July: Do the cutting, gluing, and painting at home before the chaos of move-in day.
- Weight is Everything: If it can’t be held up by a Command Strip, it doesn’t belong on a dorm room wall.
- Think Outside the Box: A headboard doesn’t have to be a padded board. It can be a tapestry, an arch decal, or suspended pillows.
- Protect the Walls: Always use renter-friendly adhesives to avoid heavy fines at move-out.
Frequently Asked Questions
How do you stick a headboard to a dorm wall without causing damage? The golden rule of dorm decor: Heavy-Duty Command Strips or Velcro hanging strips. Never use nails, screws, or cheap double-sided tape that might rip off the drywall paper. If your headboard is made of foam board or cardboard, 4 to 6 large Velcro strips will easily hold it up all year.
Is making a DIY dorm headboard actually cheaper than buying one? Yes, significantly. A pre-made, dorm-specific headboard from a big-box retailer can cost anywhere from $70 to $200. A cardboard, batting, and fabric DIY version usually costs under $30, making it the ultimate budget-friendly dorm decor hack.
How wide should a headboard be for a dorm bed? Almost all college dorm beds are Twin XL size. To ensure your headboard looks proportional, you should make it between 39 and 41 inches wide.
Will an RA let me have a custom headboard? Most RAs only care about two things: fire hazards and wall damage. As long as your headboard isn’t blocking a sprinkler, isn’t made of highly flammable exposed materials right next to an outlet, and is hung with damage-free strips, you will be totally fine.
Can I make a headboard if my bed is lofted? Yes! In fact, a headboard is great for lofted beds because it prevents your pillows from falling down the gap between the bed and the wall. Just make sure the headboard is mounted securely to the wall, not just leaning, so it doesn’t fall on your roommate below.
Conclusion
Move-in day does not have to be a sweaty, stressful nightmare of trying to make a sterile cinderblock room look cute. By taking advantage of the summer downtime in July, you can knock out these easy DIY projects for move-in day and roll up to campus looking like a total design pro.
Pick your favorite DIY dorm headboard style from this list, grab your supplies this weekend, and get crafting. When your roommates are stressing over blank walls in August, you’ll be lounging against your aesthetic, custom-made setup.
Ready to totally reinvent your college space? Pin this post to your Dorm Inspo board right now so you don’t lose these tutorials, and let me know in the comments which headboard you’re building!